Facebook Timeline

Facebook Page Guidelines: The rules have changed for cover photos...again

When we posted last week about 5 mistakes that will get your Facebook Page deleted, we missed something. Thanks to our friend Shawna, at ReSoMe, we learned that sometime between December 20th and March 13th, Facebook updated their Page Guidelines and threw marketers a little bone.

The 20% rule went into effect in December

Way back on December 20th, Inside Facebook wrote about the recent addition of a 20% text rule, which included these quotes from the Facebook Page guidelines:

Pages Terms Section III.B reads:

Covers may not include:

i.    images with more than 20% text;

ii.    price or purchase information, such as “40% off” or “Download it on socialmusic.com”;

iii.    contact information such as a website address, email, mailing address, or information that should go in your Page’s “About” section;

iv.    references to Facebook features or actions, such as “Like” or “Share” or an arrow pointing from the cover photo to any of these features; or

v.    calls to action, such as “Get it now” or “Tell your friends.”

But wait…something more has changed since December

When we wrote about the rules that can get your page deleted, these are the guidelines we included. However, when Shawna sent a message to say that they’d been changed, I jumped over to see how:

Section III.B now states:

All covers are public. This means that anyone who visits your Page will be able to see your cover. Covers can’t be deceptive, misleading, or infringe on anyone else’s copyright. You may not encourage people to upload your cover to their personal timelines. Covers may not include images with more than 20% text.

The Help Center has been updated as well:

What are the guidelines for my Page’s cover photo?

Use a unique image that represents your Page. This might be a photo of a popular menu item, album artwork or a picture of people using your product. Be creative and experiment with images your audience responds well to.

All cover photos are public, which means anyone visiting your Page will be able to see the cover photo. Cover photos can’t be deceptive, misleading, infringe on anyone else’s copyright or be in violation of the Pages Terms. You may not encourage people to upload your cover photo to their personal timelines.

Cover photos must be at least 399 pixels wide and may not include images with more than 20% text.

To get the fastest load times for your Page, upload an sRGB JPG file that’s 851 pixels wide, 315 pixels tall and less than 100 kilobytes. For images with your logo or text content, you may get a higher quality result by using a PNG file.

What does it all mean?

It’s now safe to include everything that was previously banned, including: price or purchase information, contact information, references to Facebook features or actions, such as “Like” or “Share” or an arrow pointing from the cover photo to any of these features; or calls to action.

Just don’t use more than 20% of the image space to do it. See? It’s a bone, but it’s a little bone.

How will you change your cover photo under the latest revision of the guidelines?

The Facebook private message controversy: how to hide posts from your timeline

If you haven’t heard already I’m sure that it won’t come as any great surprise that another controversy with Facebook privacy came to light last week.

This time the issue is private messages showing on users public timeline.

Are they or aren’t they?

Facebook has investigated and they are saying that it isn’t so, with the explanation that wall posts and private messages are two separate systems coded in different languages. However, quite a few users have gone and examined the messages that are showing from their friends and maintain that they were once private messages.

We’ve become much more aware of privacy concerns since the time of these posts (pre-2010), as the Facebook interface has become more and more open. So, whether or not private messages have become public, if there is content on your wall that you don’t want public, now is the time - as Facebook finalizes the Timeline rollout - to hide or delete those posts from your timeline. 

The posts in question all seem to be from before 2010, which happens to coincide roughly with the timing of when we went from wall-to-wall conversations to having likes and comments on posts. So, when looking at the Timeline, these posts will already look different.

To hide them, go to the year you want to hide posts from others. You’ll find a box labeled “Friends” with all the posts from your friends for that year (it’s usually right at the top of each year on the right side of your screen. The process is the same for any Timeline story:

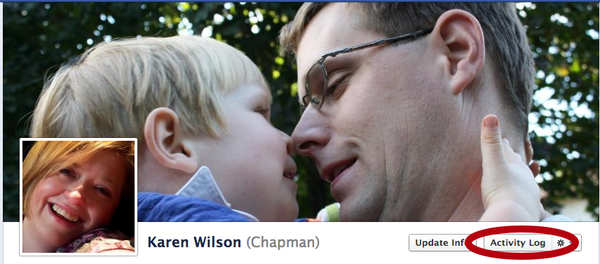
I hid the friends box for all years, so all those posts still exist and I can still access them from my Activity Log, which you can get to by clicking the button at the top of your Timeline page.

One other step I took to be certain that private messages wouldn’t be made public was to delete my old private messages. 

PLEASE NOTE: Hiding content from your Timeline does not mean it is deleted. It may be viewable in other places on Facebook - a friend’s wall, company page, etc. If you don’t want that content to exist on the live Facebook site anymore, select to delete it.

Regardless of what anyone believes about this particular incident and how it happened, it is disturbing to think that “private” messages are no longer private. But this situation is a very effective reminder that nothing we do on the internet is ever private. It’s important to remember this before posting, because data posted to the internet never truly goes away.

If you have something truly private to say/share with someone, do it via email or text if you have to communicate electronically. Don’t rely on a social network to keep your private business from going public.

How to schedule posts on your Facebook Page

Facebook recently made some updates to Pages that are really exciting. I think I could feel the excitement of every page admin I know when we all read about admin roles and scheduled posts.

But how do you schedule them?

It’s not super obvious, so here’s the rundown:

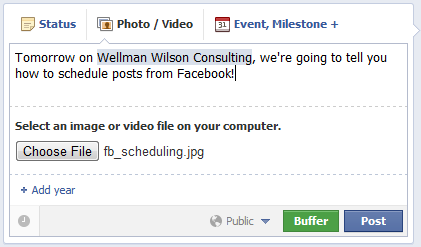
1) Set up the content that you want to schedule - status, link, picture or video. Add any text you want to include.

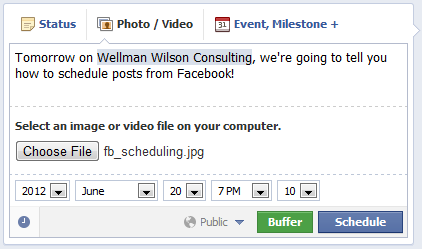
2) At the bottom left of your post you’ll see a little clock. Click on it and select the year, month, day, hour and minute (you only get the 10s as an option) you want your post to be published.

3) Press the submit button and Facebook will confirm that you’re scheduling the post for the date and time you specified and you can close out or go to your Page’s activity log to see the post. 


BUT, what if that post you scheduled needs to be changed or cancelled later?

Good question! Because this part is even less obvious. First, apparently you have to be using Facebook as yourself - not as your Page.

Go to your page (still logged in as you).

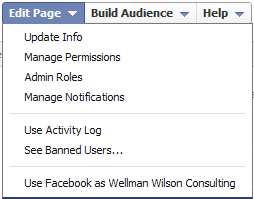
At the top of your page, you’ll see an Edit Page button. If you click on it, there is a list of options. Select Use Activity Log.

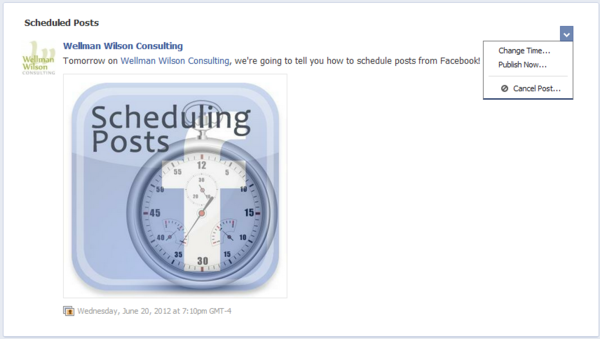
The top section of your activity log has all your scheduled posts. You can change the scheduled time or delete the content but editing isn’t available…yet (I’m betting a future update will clear up this little issue).

Now, isnt this handy!? And if you go to our Facebook page today, you’ll see that post was published last night as planned. (Feel free to like our page while you’re there if you’re so inclined. ;)

Have you scheduled any posts to Facebook yet? What do you think do far?

Countdown to Timeline: You can do it!

Timeline for business pages will no longer be an option as of tomorrow - March 30.  Many have been putting off switching to the new look because they’re worried or overwhelmed with what’s involved.  We’re here to remind you, you can do it and we’re here to help you through the process.

Step one : profile image

This image is the one that will appear next to your status updates and on mobile devices (Timeline doesn’t show up on them yet) so pick something that best represents you.  Most of the time, that would be your logo.

Step two: cover image

This is an opportunity to showcase what you do or who you are. The image can’t include any calls to action or your URL so instead think of it as an opportunity to connect with your audience and showcase what you do.

There are many designers who are helping people create cover photos for their Facebook pages that you can hire to help you.  A few include (we are in no way affiliated to them):

- Sweet Smart Designs

- Rake Consulting

- CL Buchanan Photography and Design

If you’re going to do it yourself, the dimensions and rules for the Timeline cover image are all outlined in our previous post about Timeline. 

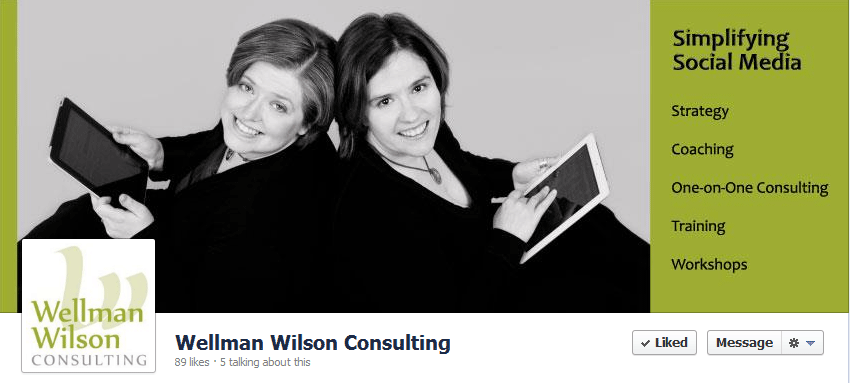
We used our photo with some simple keywords on what we do.

Here are a few other examples:

It doesn’t need to be complicated.

Step three: Tabs/Applications

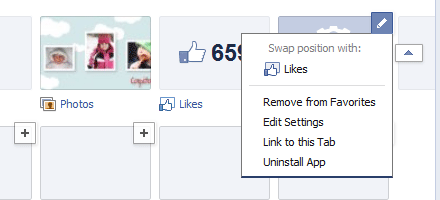
You can feature up to four tabs right under your cover image.  You can decide the order really easily by clicking on the triangle to the right of the tabs and then clicking on the edit button on the individual tabs to decide the order you would like.  We’ll be writing more tutorials on this in the coming weeks!

It’s really not hard - you can do it! And when you do, leave us a comment so we can come and see!

Have you updated your page to Timeline yet?