how to Facebook

How to set up a Facebook page for your small business

In this post we’re taking you back to step one of promoting your business on Facebook - how to set up your Facebook page.  In this video, we walk you through the process step by step and then we have some additional resources to share with you afterwards.

Step by step:

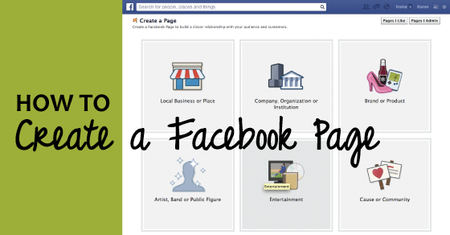
  1. Go to www.facebook.com/page
  2. Select the kind of page that is right for your business.  “Local business or place” requires an address, the other options do not.
  3. Write a short description of your business and include your business’ URL as soon as possible
  4. Upload a profile image
  5. Upload a cover image - try to make it visual and not too text heavy
  6. Complete the about section as thoroughly as possible
  7. Start inviting people to like your page!

Resources

A collection of some of our best Facebook posts

What does it mean to check in? 

How to get people to like your Facebook page

How to get engagement on your Facebook page

Image sizes

Profile image: 180x180 pixels.

Cover image:  851 pixels wide and 315 pixels tall

If you have any questions, please let us know in the comments!

If you aren’t already signed up for our newsletter, take a minute and go sign up. You’ll get our free Simple Start e-book that will help you create awesome content for your new Facebook page!

Simple social media tips: Linking to status updates

One of the loudest messages we tell people about social media is that we don’t believe that your channels should be automatically feeding into each other.  Don’t let your Facebook feed into Twitter, don’t let your Twitter feed into LinkedIn and don’t let anything feed into your Facebook.  Different audiences deserve personalized messages.

We do however, encourage you to send people from one channel to the other!

If you’re having an interesting conversation on Facebook, LinkedIn or Google+, by all means, select that specific post and link to it from one of your other channels: 

 “We’re having a great discussion about Google+ on Facebook, come tell us what you think: <insert url>”

But how do you do that?

Click on the timestamp

Every post you make, on any of the channels, tells you when it was posted.  If you click on that it will bring you to that specific post.

Copy the URL

Select the URL at the top of your browser and copy it.  You can now paste it anywhere and have people come to that specific post.

It’s simple and a great way to point people to your different networks.  You can also use it to screen capture posts to use in blog posts :)

Do you send your audience to your other networks?

Countdown to Timeline: You can do it!

Timeline for business pages will no longer be an option as of tomorrow - March 30.  Many have been putting off switching to the new look because they’re worried or overwhelmed with what’s involved.  We’re here to remind you, you can do it and we’re here to help you through the process.

Step one : profile image

This image is the one that will appear next to your status updates and on mobile devices (Timeline doesn’t show up on them yet) so pick something that best represents you.  Most of the time, that would be your logo.

Step two: cover image

This is an opportunity to showcase what you do or who you are. The image can’t include any calls to action or your URL so instead think of it as an opportunity to connect with your audience and showcase what you do.

There are many designers who are helping people create cover photos for their Facebook pages that you can hire to help you.  A few include (we are in no way affiliated to them):

- Sweet Smart Designs

- Rake Consulting

- CL Buchanan Photography and Design

If you’re going to do it yourself, the dimensions and rules for the Timeline cover image are all outlined in our previous post about Timeline. 

We used our photo with some simple keywords on what we do.

Here are a few other examples:

It doesn’t need to be complicated.

Step three: Tabs/Applications

You can feature up to four tabs right under your cover image.  You can decide the order really easily by clicking on the triangle to the right of the tabs and then clicking on the edit button on the individual tabs to decide the order you would like.  We’ll be writing more tutorials on this in the coming weeks!

It’s really not hard - you can do it! And when you do, leave us a comment so we can come and see!

Have you updated your page to Timeline yet?

Facebook: Focus on a topic with interest lists

There’s a lot of noise on Facebook. There’s also too much content for everything to show up in your stream let alone you noticing everything that goes by.

Facebook has recently introduced interests lists that can help you filter through all the noise and drill down to the content you’re really looking for.

What are they?

Interest lists are groupings of people and pages. When you select a list your main newsfeed will only have updates from those in the list.

You can create your own lists on whatever subject you would like, or you can subscribe to other people’s lists.

I’ve created several lists:

Ottawa businesses

Blogs

Resources for Entrepreneurs

Where do I find them?

To the left of your newsfeed, at the bottom.

How can I find lists to follow?

Select Add Interests from your left hand menu.

Enter keywords in the search box, then simply click subscribe on any lists you find interesting.

How do I create lists?

From the same screen select +create list

It will pop up a window where you can select people from your friends, pages you follow or are subscribed to, or allow you to search Facebook with keywords.

Once you’ve chosen what/who you’d like in the list click next and choose a name for your list.

Then you are done.  Your lists and all lists you subscribed to will show up at the bottom left of your newsfeed screen with your lists in blue and other people’s lists in green.

Have you created any interest lists? Share the link in the comments!

Tutorial: Creating a Facebook widget for your Web site/Blog

Having a Facebook page is a great way to stay engaged and connected to your audience - whether for your business or for your blog.  Having your content filter through their news feed increases the chances that they will remember to visit your site and that you will stay top of mind.

There are many ways to get people to like your Facebook page but my biggest and simplest piece of advice is that you need to make it EASY for them to do it.  Taking out barriers makes people far more likely to do things.

Today I’m going to walk you through the steps for installing a widget on your blog or web site. (This tutorial assumes you already have a Facebook page.)

1. Go to your Facebook page and select Edit Page in the top right corner.


2 Select Resources from the left hand menu


3 Select “Use Social plugins” -> scroll down until you see the “like box” option


4. Choose your preferences.  

1) Insert the page URL you’re building the widget for

2) Choose how wide you want the widget to be

3) Decide what features you want included. You can have a sample of the stream but in this case I turned it off because it was too narrow and didn’t look great. There is a preview to the right, decide what you think looks best as you play around with it.

4) Click on “get code”


5: Get code. 

Depending on your site you have three different options for the kind of code you can grab to put onto your site. For my wordpress blog <iframe> is what was required.


6. Post to your web site.

Because there is no one way to do this, depending on what kind of site you have, I will leave this step to you.  This is how the Kids in the Capital widget look when done. Now people can like the page without even leaving the blog!


I hope this was helpful - please let me know if you have any questions!